
You know how some bloggers complain or tweet about having to spend hours just to photoshop/ edit their photos for their blog posts? I admit, i'm one of the guilty ones. Most of you will be like thinking, "What are they editing? What is there to edit? Why can't they just post straight from the camera, wouldn't that be much faster?" WHY WHY WHY
Well, speaking up for myself, all i can say is that i just want my photos to look nice by editing the colour and contrast of the photos before i post it up online! Not forgetting to photoshop any flaws like pimples and such not only for myself, but also for my friends that appear on my blog. Don't you realised that everyone looks almost perfect in the photos?
I have to admit. There's a little bit of liquifying here and there to get that jaw line, smaller nose, bigger eyes, slimmer arms. Okay, it's getting abit exaggerating here. Just minor touch ups. So here's a simple guide on what i do to edit my photos! Basically it's the same few steps repeated for maybe 20 photos in row. Not very easy i would say though :|
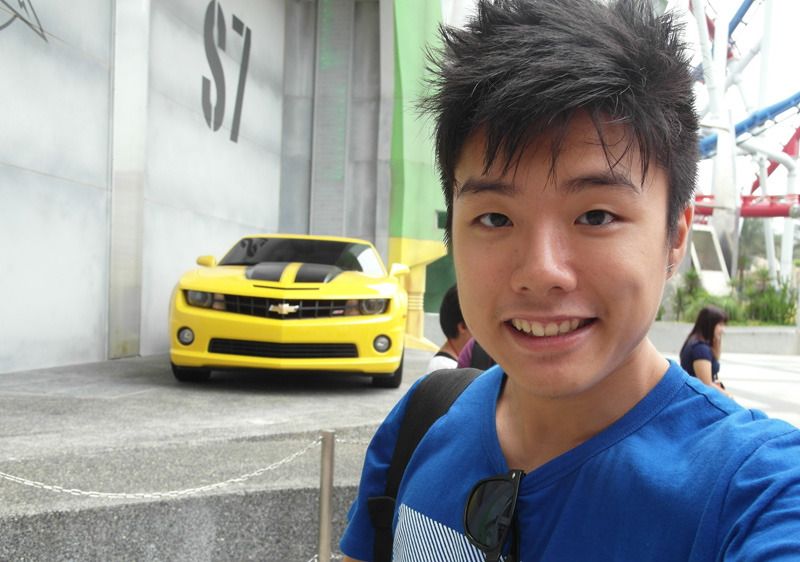
Above we have a perfectly RAW photo direct from the camera. ZERO edits. Honestly, i'm really impressed with my Samsung EX1 for taking great shots after shots. It's definitely one of the best camera i've used so far. But i recently sold it away for another camera (It's time to upgrade!) Will blog more about it maybe in one of the next few posts! :D
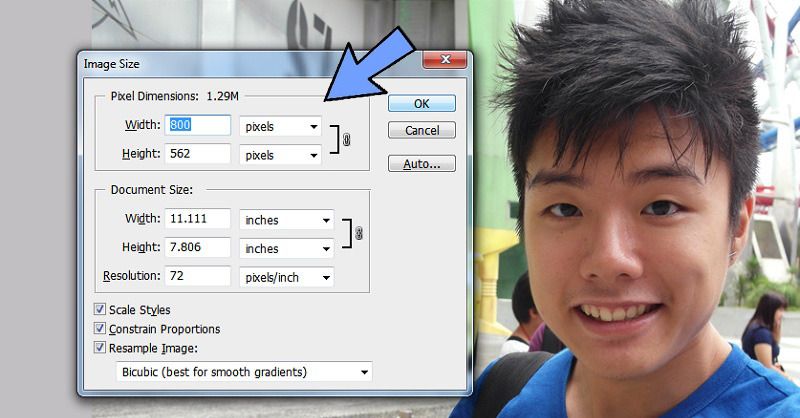
Step #1: Adjust the image size (CTRL + ALT + I)
Since the photos are to be posted online, we don't actually have to edit based on the size the photo was taken, which can be as huge as 2592 x 1944 pixels for a 8 megapixel photo! It will take longer time to process your photos if the file size is big so i would suggest reducing it to your blog image size, in my case - 800 pixels. Much easier to work on.
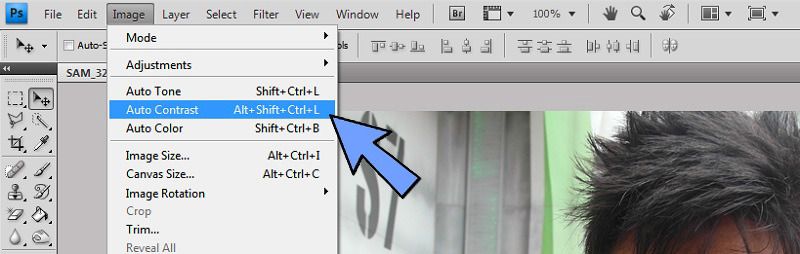
Step #2: Auto ______.
Photoshop itself is a powerful photo editing tool so there's some idiot proof functions like the Auto tone, Auto contrast and Auto color. (Shortcuts as shown on the image) These 3 functions will most probably adjust your photo to look much better without you having to do anything. I tend to be abit fussy on the brightness and contrast so what i do is...
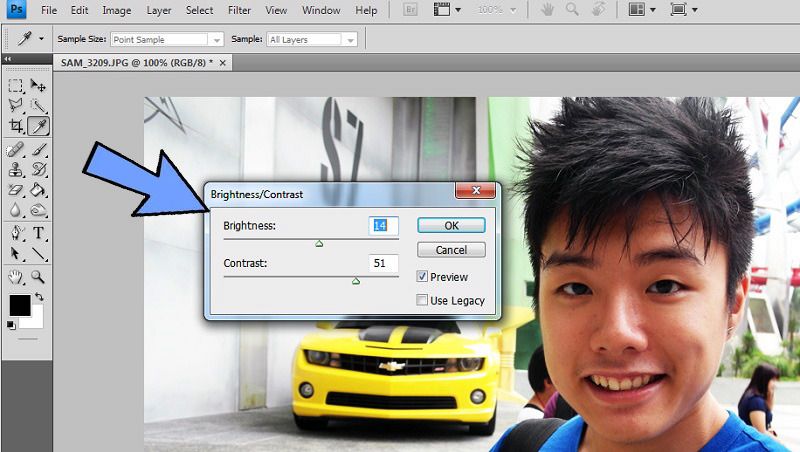
Step 3: Adjust Brightness and Contrast.
Ever since i started using Photoshop, there has never been a short cut to the Brightness and Contrast panel which i have no idea why and it's like one of the most important panel for me. Ok, i just went to google why and why i got is. Apparently noobs are the ones who use the B&C panel. The Pros just go straight to CTRL + M for the Curves panel -_-
Now you can see the colours in the above photo is much better!
Now you can see the colours in the above photo is much better!
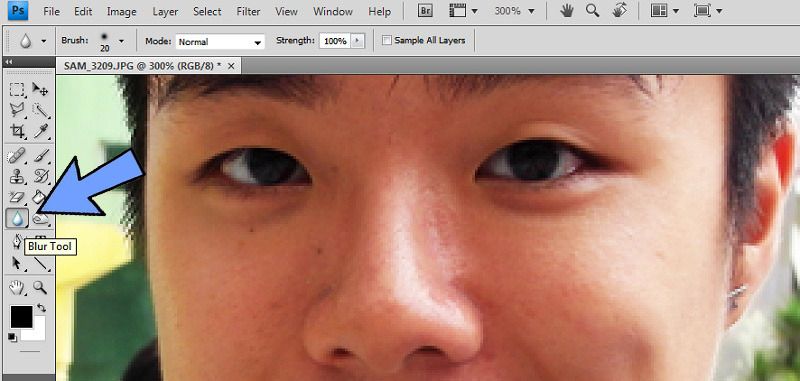
Step 4: Remove the flaws.
See the flaws. Well, we are all human, just that you don't really see the flaws of my face on this blog. To remove a single or a few pimples, use the Spot healing brush (4th icon on the first column) if not, you can be as lazy as me and just use the Blur tool. Simple just use the tool and go over the flaws and blur them to the natural skin colour.
Piece of advice: Don't overdo the blur-ness. Everyone has flaws ;)
Piece of advice: Don't overdo the blur-ness. Everyone has flaws ;)

Step 5: Liquify. (SHIFT + CTRL + X)
Now that you got the colours of the photo settled, you removed the flaws on the humans, let's do some plastic surgery. Want slimmer face? Want to see that jawline? Eyes to be bigger? Hair to have more volume? This is the tool.

I'm editing the jawline in the above photo. Firstly choose your brush size by using the keyboard short cut "[" and "]" to adjust the size. After which, use the "+" in the center of the brush to "push" the jawline inwards until you feel satisfied. To make eyes bigger, use the "Bloat" tool and click at the iris to make the eyes bigger, adjust accordingly.
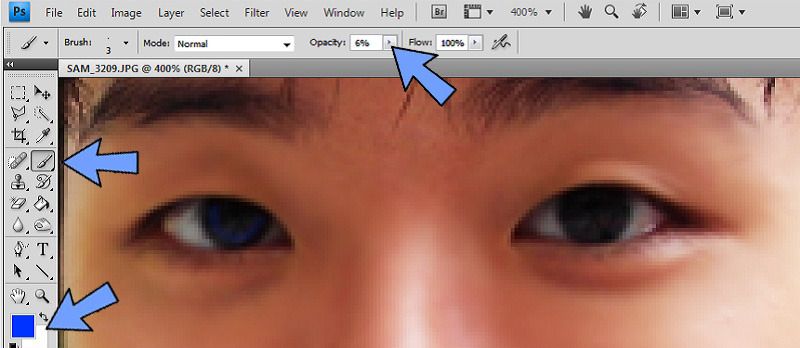
Additional Step #6: Add in contact lens.
This has got to be the easiest way to input contact lens into your eyes compared to all the complicated ways out there! I somehow "learnt it" myself through exploring. What you need is the colour of the lens, the brush tool and the opacity as shown above. Instead of describing how i do it, why not watch this 55 seconds (yes, it's that short and easy!) video which i did few years ago to share with my readers how to photoshop contact lens! ♥
Seem quite easy right? Practice makes perfect! Try it!

Step 7: BURN.
The "Burn tool" helps to darken parts of the photos so you can randomly darken some of the background to give the photo more "depth" In this case, i darken the walls of the background to make the photo look more 3D.
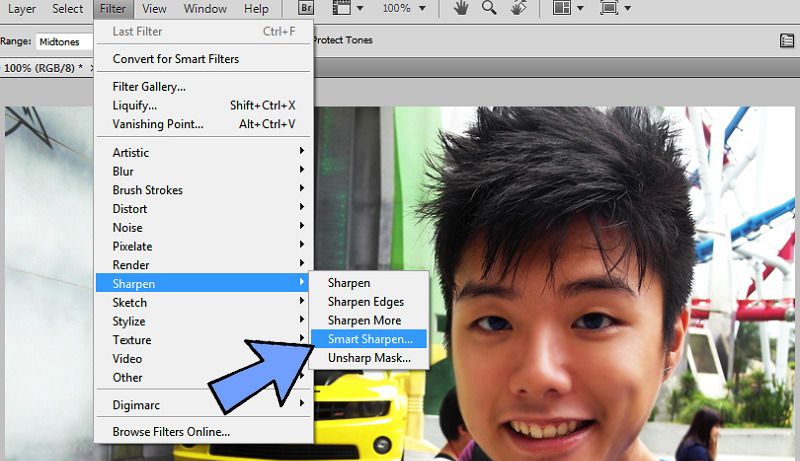
Step 8: Smart Sharpen (Filter - Sharpen - Smart Sharpen)
This is the final step before saving the photo! Basically you "conclude" the photos by giving it a smart sharpen so that whatever is blur become clear, and whatever is clear becomes clearer. Remember i used the "Blur tool" on my face previously to cover those flaws? After smart sharpen, the smoothness of the face is not so obvious! *flicks hair*
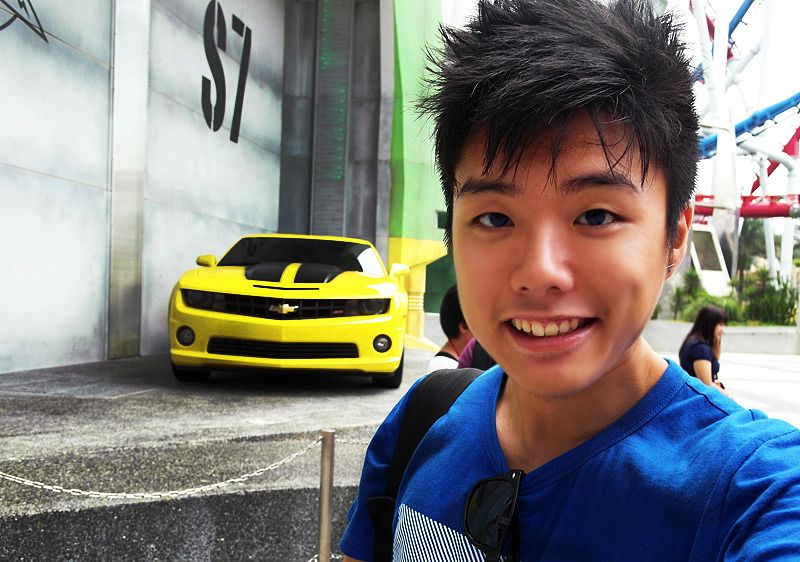
THE END RESULT OF THE PHOTOSHOP-ED IMAGE!
Now let's put the before and after photo together:

The difference is really quite obvious right?
Well, basically that's what i do to edit my photos on this blog. If a blog post has 20 photos to edit and all the photos has at least one human in them, i will just repeat all the 8 steps for 20 times. If each photo takes about 4 mins to edit, 20 photos will take 80 mins. That's 1 hour and 20 mins! So now you get it why i take so long to edit my photos? LOL
Hope you enjoy this photoshop "tutorial" ♥