Monday, May 21, 2012

My new Baby - Lumix G2! ♥

Well, if you have been following me on twitter, you would have read that i recently sold away my beloved Samsung EX1 camera and bought another camera! Honestly speaking, the Samsung EX1 is one of the best camera that i ever had. It's easy to bring around, it has a fantastic swivel screen which is perfect for camwhoring with friends, almost every shot turns out brilliant (minimal editing required) and the list just goes on and on. Damn, i'm starting to miss it already :(

I even imported a leather case from Hong Kong, and bought a special transformers lens to zeng it. Now i sold it away. For just $300. Condition was 8/10, with an additional spare battery. Shall stop harping on it since i already sold it. To find a camera that is as good as the EX1 or even better was quite tough, until i came across the Panasonic Lumix G2.

There's a story behind every camera i got. For this Lumix, it first caught my eye when i was window shopping at Vivo. Best Denki was having a Mother Day's promotion (original price was $1099!) It caught my attention for its size but i never thought of getting it since i had a fantastic EX1. But out of curiosity, i went home to research about Lumix G2.
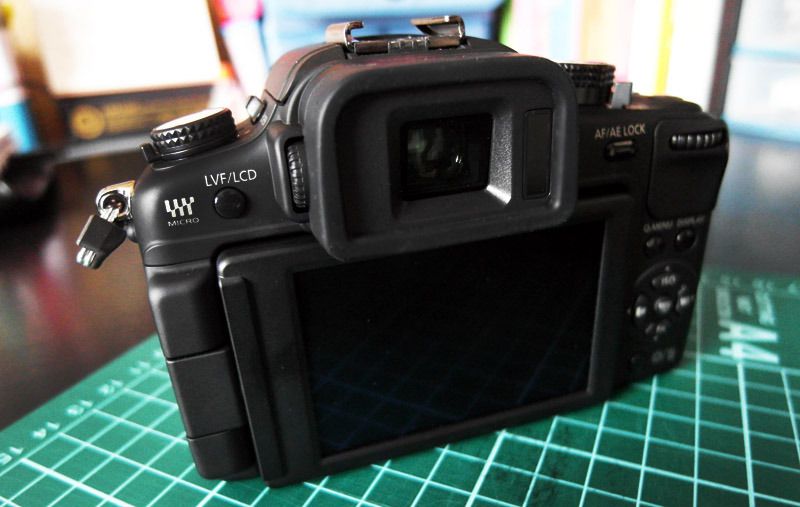
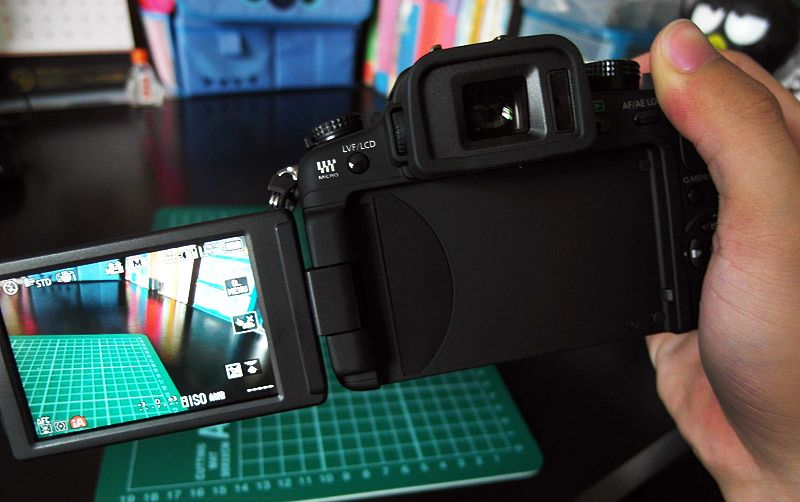
One important factor i was looking at was the Swivel screen. I'm so used to the swivel screen that my new camera MUST have it. There's quite limited choices in the market now, mainly the Canon 600D, 60D, G12 and a few others. But they are all either quite ugly, heavy or bulky. But this Lumix G2 is light and the size is actually smaller than a DSLR.

Not only that, it has a viewfinder that i always wanted (although it's an electronic one) and guess what? It's touch screen! One special feature is that you can even use the touch screen as the shutter button! Just tap anywhere on the screen to take a photo, easy for camwhore! The only downside i find is that one lens does not do everything. Because this camera is a micro 4/3, i have to get different lenses and they cost a bomb! The pancake lens for close/macro photography cost about $400+ (i think!) With that money, i can buy a compact camera le lor. Not buying for now!
Oh ya, the story is... That night after researching, i decided to upgrade to the Lumix G2. But first i had to make sure someone wanted to buy my EX1 so i can top up the remaining. Within minutes after i tweeted, i got a buyer. (I got a feeling i sold it too cheap -_-) The next morning, i called almost all the Best Denki outlets in Singapore to ask if they have stock for the Lumix G2. Because it's on offer, most of the stocks were sold. To name a few, Century Square, Parkway Parade, all sold out. The Compass point outlet opens 3o mins than most outlets so i waited and pray. Called them at 10.30am sharp and was told they have one more set left! So i reserved it and cabbed down to pick it up!

Well, i'm now a proud owner of the Lumix G2! (Although i haven't really learn how to use it yet, still using the auto function -_-) Hope i won't be lazy to bring it out since it's much bigger than my EX1. (I was already complaining about bringing out the EX1, LOL) FYI, my dream camera is still the Fujifilm X100 but it's still $1699 for now! So expensive lor :(
Thursday, May 17, 2012

Easy guide to photoshop-ing your photos!

You know how some bloggers complain or tweet about having to spend hours just to photoshop/ edit their photos for their blog posts? I admit, i'm one of the guilty ones. Most of you will be like thinking, "What are they editing? What is there to edit? Why can't they just post straight from the camera, wouldn't that be much faster?" WHY WHY WHY

Well, speaking up for myself, all i can say is that i just want my photos to look nice by editing the colour and contrast of the photos before i post it up online! Not forgetting to photoshop any flaws like pimples and such not only for myself, but also for my friends that appear on my blog. Don't you realised that everyone looks almost perfect in the photos?

I have to admit. There's a little bit of liquifying here and there to get that jaw line, smaller nose, bigger eyes, slimmer arms. Okay, it's getting abit exaggerating here. Just minor touch ups. So here's a simple guide on what i do to edit my photos! Basically it's the same few steps repeated for maybe 20 photos in row. Not very easy i would say though :|

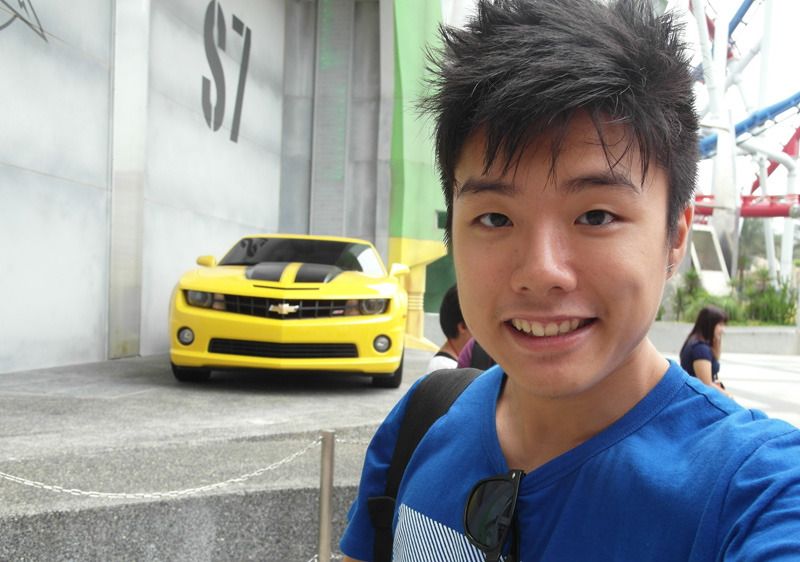
Above we have a perfectly RAW photo direct from the camera. ZERO edits. Honestly, i'm really impressed with my Samsung EX1 for taking great shots after shots. It's definitely one of the best camera i've used so far. But i recently sold it away for another camera (It's time to upgrade!) Will blog more about it maybe in one of the next few posts! :D

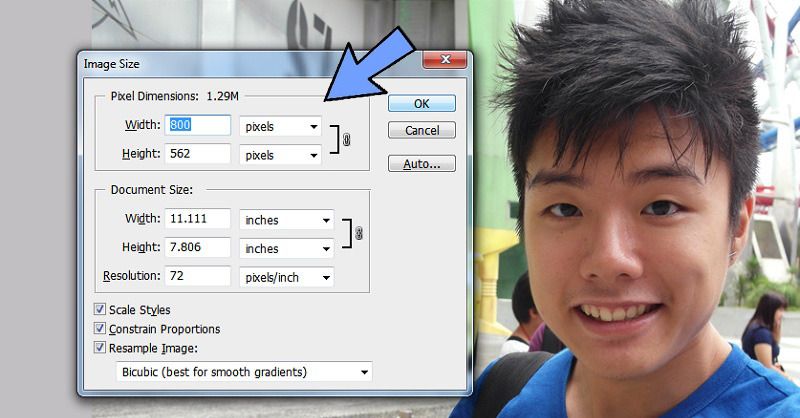
Step #1: Adjust the image size (CTRL + ALT + I)

Since the photos are to be posted online, we don't actually have to edit based on the size the photo was taken, which can be as huge as 2592 x 1944 pixels for a 8 megapixel photo! It will take longer time to process your photos if the file size is big so i would suggest reducing it to your blog image size, in my case - 800 pixels. Much easier to work on.

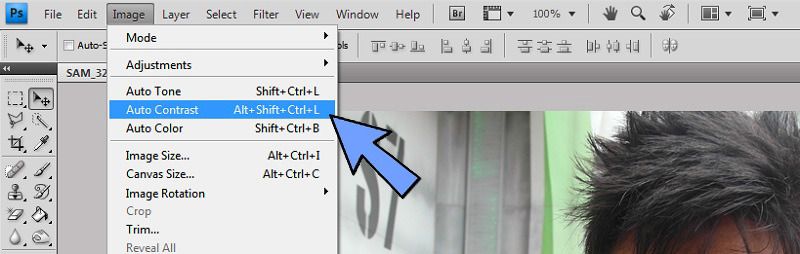
Step #2: Auto ______.

Photoshop itself is a powerful photo editing tool so there's some idiot proof functions like the Auto tone, Auto contrast and Auto color. (Shortcuts as shown on the image) These 3 functions will most probably adjust your photo to look much better without you having to do anything. I tend to be abit fussy on the brightness and contrast so what i do is...

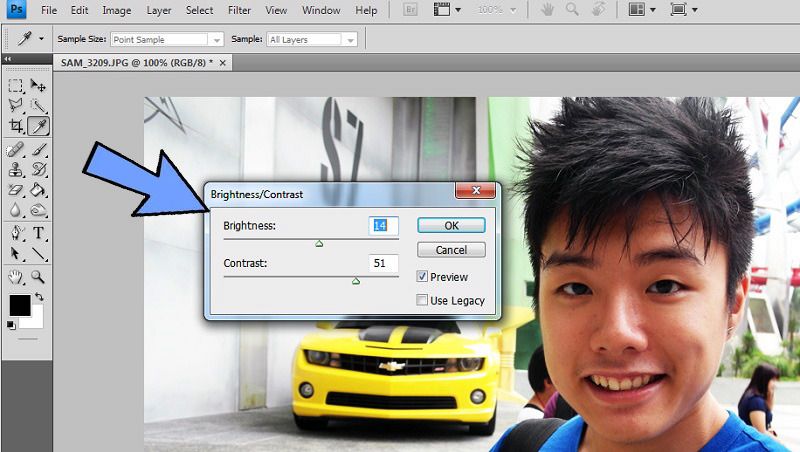
Step 3: Adjust Brightness and Contrast.

Ever since i started using Photoshop, there has never been a short cut to the Brightness and Contrast panel which i have no idea why and it's like one of the most important panel for me. Ok, i just went to google why and why i got is. Apparently noobs are the ones who use the B&C panel. The Pros just go straight to CTRL + M for the Curves panel -_-

Now you can see the colours in the above photo is much better!

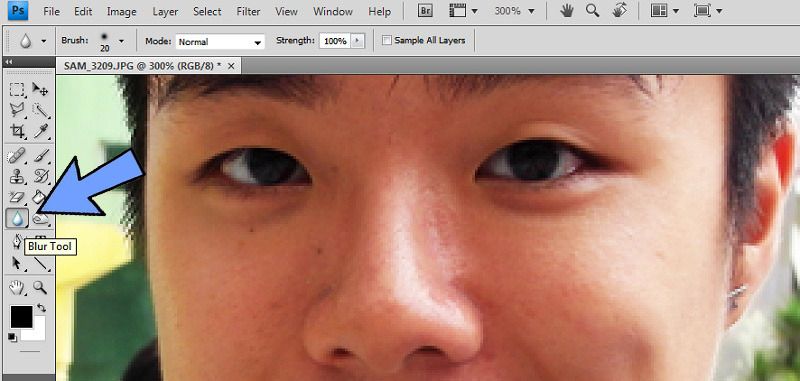
Step 4: Remove the flaws.

See the flaws. Well, we are all human, just that you don't really see the flaws of my face on this blog. To remove a single or a few pimples, use the Spot healing brush (4th icon on the first column) if not, you can be as lazy as me and just use the Blur tool. Simple just use the tool and go over the flaws and blur them to the natural skin colour.

Piece of advice: Don't overdo the blur-ness. Everyone has flaws ;)

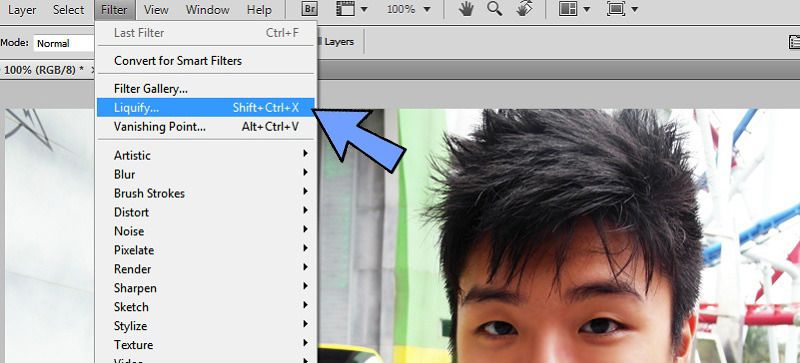
Step 5: Liquify. (SHIFT + CTRL + X)

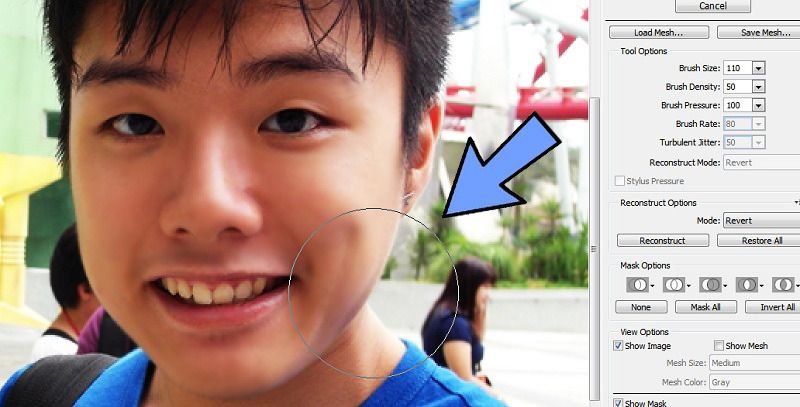
Now that you got the colours of the photo settled, you removed the flaws on the humans, let's do some plastic surgery. Want slimmer face? Want to see that jawline? Eyes to be bigger? Hair to have more volume? This is the tool.

I'm editing the jawline in the above photo. Firstly choose your brush size by using the keyboard short cut "[" and "]" to adjust the size. After which, use the "+" in the center of the brush to "push" the jawline inwards until you feel satisfied. To make eyes bigger, use the "Bloat" tool and click at the iris to make the eyes bigger, adjust accordingly.

Additional Step #6: Add in contact lens.

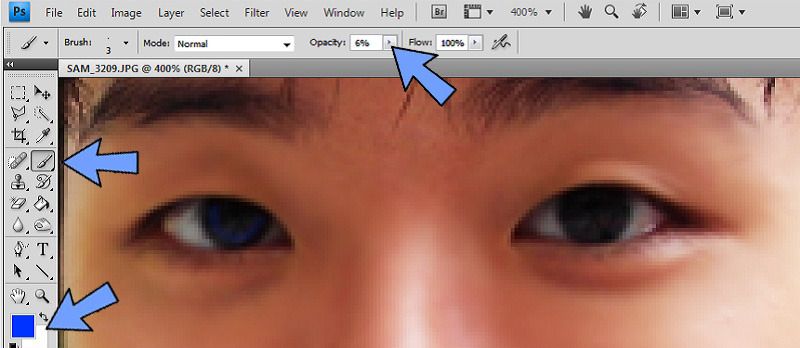
This has got to be the easiest way to input contact lens into your eyes compared to all the complicated ways out there! I somehow "learnt it" myself through exploring. What you need is the colour of the lens, the brush tool and the opacity as shown above. Instead of describing how i do it, why not watch this 55 seconds (yes, it's that short and easy!) video which i did few years ago to share with my readers how to photoshop contact lens! ♥


Seem quite easy right? Practice makes perfect! Try it!


Step 7: BURN.

The "Burn tool" helps to darken parts of the photos so you can randomly darken some of the background to give the photo more "depth" In this case, i darken the walls of the background to make the photo look more 3D.

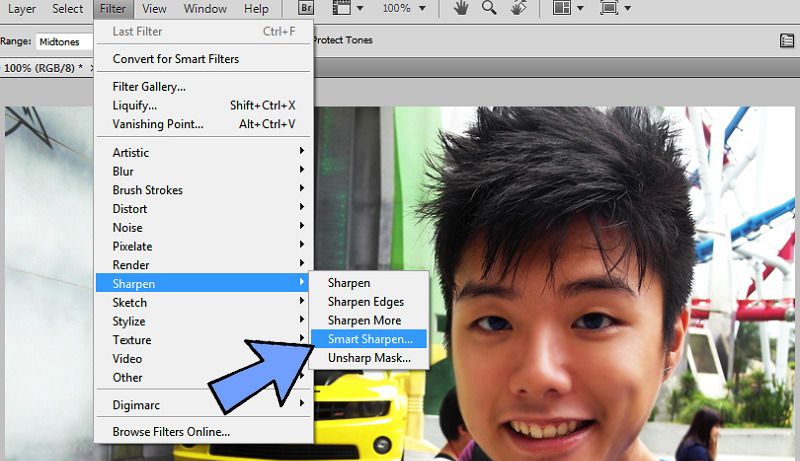
Step 8: Smart Sharpen (Filter - Sharpen - Smart Sharpen)

This is the final step before saving the photo! Basically you "conclude" the photos by giving it a smart sharpen so that whatever is blur become clear, and whatever is clear becomes clearer. Remember i used the "Blur tool" on my face previously to cover those flaws? After smart sharpen, the smoothness of the face is not so obvious! *flicks hair*

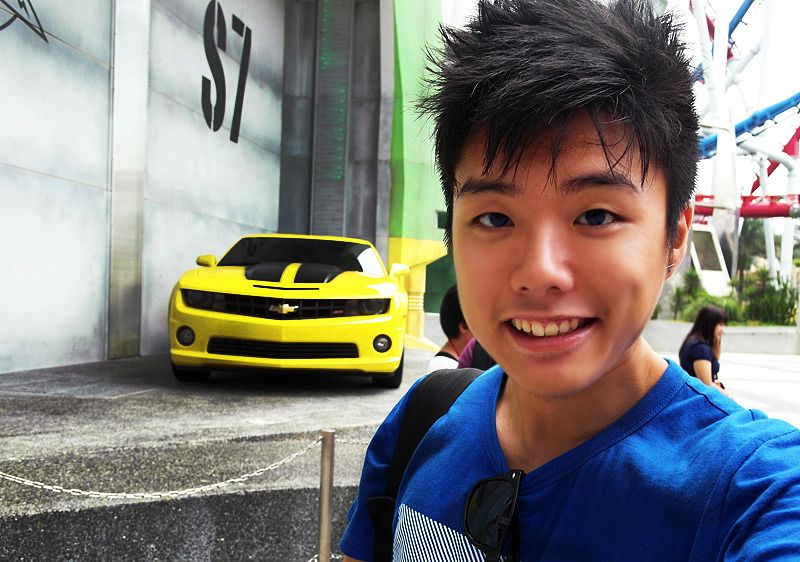
THE END RESULT OF THE PHOTOSHOP-ED IMAGE!

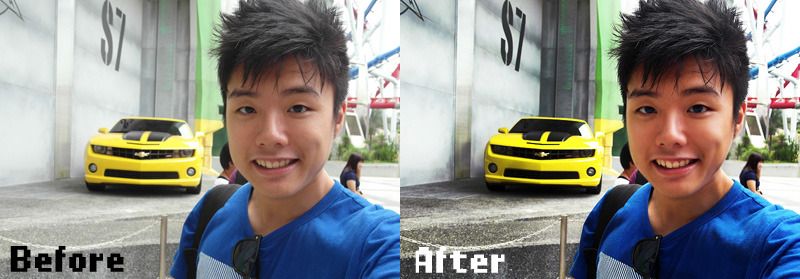
Now let's put the before and after photo together:

The difference is really quite obvious right?

Well, basically that's what i do to edit my photos on this blog. If a blog post has 20 photos to edit and all the photos has at least one human in them, i will just repeat all the 8 steps for 20 times. If each photo takes about 4 mins to edit, 20 photos will take 80 mins. That's 1 hour and 20 mins! So now you get it why i take so long to edit my photos? LOL

Hope you enjoy this photoshop "tutorial" ♥